
How Can a Clogged Dryer Vent Cause a Fire?
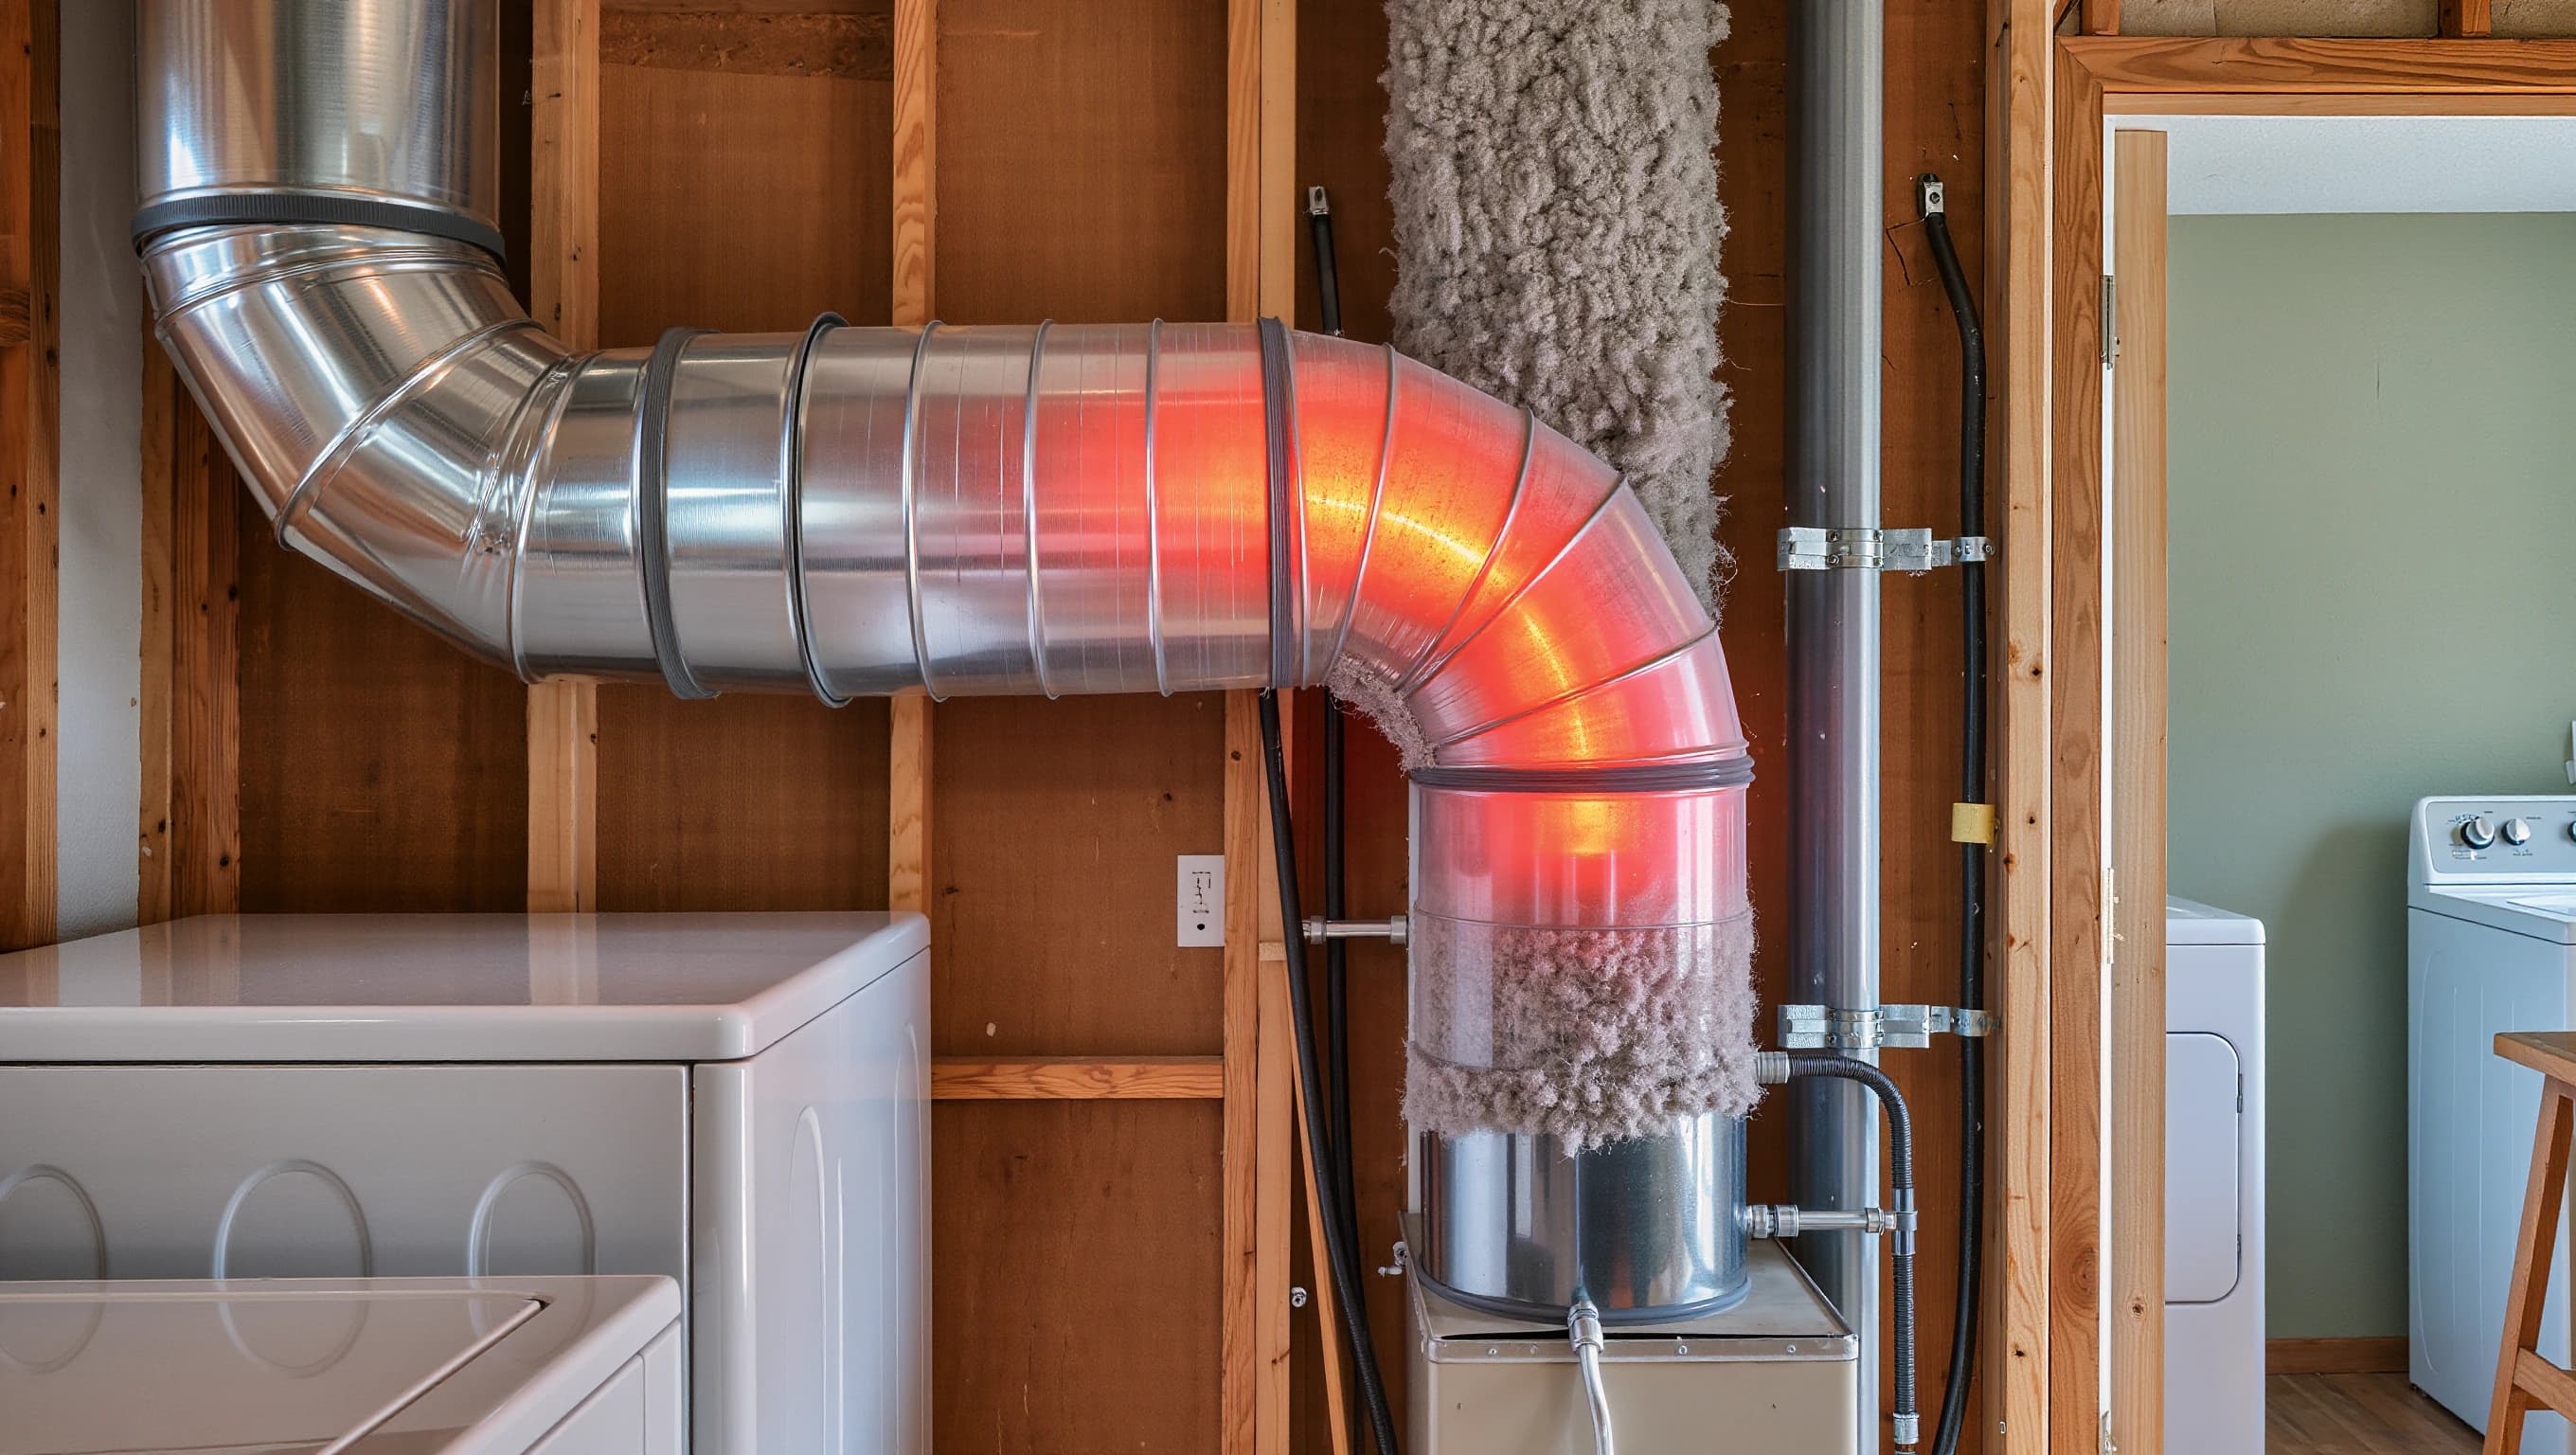
Yes, a dryer vent clogged with lint can genuinely cause a fire: accumulated lint is extremely flammable and piles up directly around the dryer's heating element, which can reach temperatures high enough to ignite it. This is one of the leading documented causes of house fires in Canada. If your dryer takes much longer to dry or smells like burning, stop using it and have the duct cleaned before continuing.
What's Happening?
Every load of laundry releases small textile fibers that slip past the lint trap and travel with the hot air into the exhaust duct. With the air's moisture, these fibers stick to the duct's inner walls and build up load after load, gradually narrowing the passage.
When the duct gets too narrow, hot air circulates poorly and stays in contact with the dryer's heating element longer. The appliance's internal temperature rises, the heating element works harder to compensate, and the accumulated lint, extremely dry and flammable, sits right where the heat is most concentrated.
A single hot spot is enough to ignite the lint, and once a fire starts inside an enclosed duct, it spreads quickly toward the wall or attic before anyone notices.
Is It Dangerous?
Yes, this is one of the rare symptoms in this series that represents a genuine fire risk, not just an inconvenience or a future cost. Fire safety agencies across Canada regularly identify poorly maintained dryer vents among the leading preventable causes of residential fires.
Act immediately, stop the dryer, and don't turn it back on before inspection if:
- You smell burning or hot plastic during a cycle
- The dryer or the wall behind it is hot to the touch
- A normal cycle now takes twice as long as before
- The outside vent hood lets very little or no air through
- You see smoke, even faint, coming from the dryer or the wall
These signs indicate the duct is likely already seriously clogged and the risk is present now, not at some vague point in the future.
Most Common Causes
| Cause | Explanation |
|---|---|
| Lint buildup never cleaned out | Forms even with a regularly cleaned lint trap, since fine fibers always slip through |
| Flexible plastic or aluminum duct | Traps lint in its folds, unlike a smooth rigid metal duct |
| Duct too long with several bends | Slows airflow and creates spots where lint builds up faster |
| Blocked outside vent hood | Snow, ice, a bird nest, or debris preventing hot air from escaping |
| Already worn or faulty heating element | Overheats more easily even with a partially clear duct |
| Dryer run repeatedly with no break between loads | Doesn't give the appliance time to cool, raising the cumulative risk |
Why This Happens in Quebec
Quebecers dry laundry in the dryer nearly all year, unlike climates where clothes can hang outside for several months. This high usage rate speeds up lint buildup compared to more occasional use.
In winter, snow and ice can partially block the outside vent hood, adding another obstacle to a duct already narrowed by lint. In older Quebec homes, particularly Montreal triplexes where the dryer is sometimes in the basement with a long duct run, the cumulative risk is higher than elsewhere.
How to Check It Yourself
You can do a simple, safe check:
- Go outside while the dryer runs and hold your hand near the outside vent: warm air should come out forcefully and continuously
- Touch the top and back of the dryer after a cycle: a normal appliance is warm, not hot
- Smell for burning or hot plastic, even faintly
- Note whether drying time has gradually increased
Don't dismantle the back of the dryer beyond the easily accessible flexible section. Don't climb onto the roof or a ladder to clear a high-up vent hood, and never poke an object into a duct you can't see all the way through.
Can I Ignore It?
No, absolutely not. This is the most clearly not-to-ignore symptom in this entire series, because the risk isn't just financial, it's physical and immediate for your family and your home.
Every additional load run with a clogged duct adds more lint and cumulative heat. The risk doesn't rise in a linear, predictable way: a duct that seemed to work "fine" yesterday can reach a critical point tomorrow, especially if you run several loads back to back without letting the appliance cool.
How Much Does It Cost?
| Service | Estimated Cost |
|---|---|
| Duct inspection | $80 - $150 |
| Full duct cleaning | $130 - $300 |
| Replacing a damaged duct | $100 - $350 |
| Dryer heating element replacement | $150 - $400 |
| Combined vent + dryer duct cleaning | $300 - $700 |
For comparison, damage from an uncontained duct fire easily runs into tens of thousands of dollars, not counting the risk to occupants.
When to Call a Professional
- You smell burning during or after a cycle, even faintly
- Drying time has doubled compared to normal
- The dryer or the wall behind it heats up abnormally
- You've never had the duct cleaned since buying the house or appliance
- The outside vent hood lets little or no visible air through
- The duct is longer than 4.5 meters or has several bends
A professional cleans the inside of the duct along its full length with specialized equipment, checks the condition of the heating element, and confirms air flows freely all the way outside, something a surface-level filter cleaning can never guarantee.
Related Questions
- My Dryer Is Taking Too Long to Dry Clothes: The Vent May Be to Blame
- Why Does My Dryer Smell Like It's Burning Even Though I Clean the Lint Trap Every Load?
- Creosote and Chimney Fire Risk: What You Need to Know
- How Much Does a Full Sweep vs an Inspection-Only Cost
- Home Insurance and Chimney Sweep Certificates: What to Know
- Noise in the Ducts: Squirrel, Raccoon, or Dead Animal?
Frequently asked questions
Should I call a professional immediately if I smell burning?+
Yes. Turn the dryer off right away, unplug it if possible, and don't turn it back on until a professional has inspected and cleaned the duct and checked the heating element.
Does my home insurance cover a fire caused by a dryer vent?+
Generally yes for the damage, but obvious lack of maintenance can complicate a claim. Keep proof of regular duct cleaning, similar to a chimney sweep certificate.
How long can it take for a clogged duct to become dangerous?+
It varies a lot depending on use, but a duct that's never been cleaned can become a real risk within one to two years of normal use, faster with heavy use or a long, winding duct.
Is a rigid metal duct really safer than a flexible one?+
Yes, a smooth rigid duct traps much less lint than flexible plastic or aluminum with its folds, and many building codes now recommend or require this type of duct.
Can I clean the duct myself to save on cost?+
You can clean the short flexible section behind the appliance, but a duct running through the wall or ceiling needs professional brushes to safely reach its full length and confirm it's truly clear.
Get a free quote
More to know before your project.
By Sophie Bouchard — Certified chimney sweep, residential fire safety specialist
Updated on July 23, 2026